Fall baking is my love language, and nothing screams autumn like Salted Caramel Apple Hand Pies. Did you know apple pie was once voted America’s favorite dessert in a national survey? No surprise there — especially when you add buttery caramel and a pinch of salt. I’ve burned pies, underbaked centers, and cried over cracked crusts, but once I nailed these handheld beauties, there was no going back. They’re easy to grab, hard to resist, and honestly, kinda addictive. In this post, I’ll share everything I’ve learned — including the one pie crust trick that saved my life (and my sanity). Let’s bake!

Choosing the Right Apples for Hand Pies
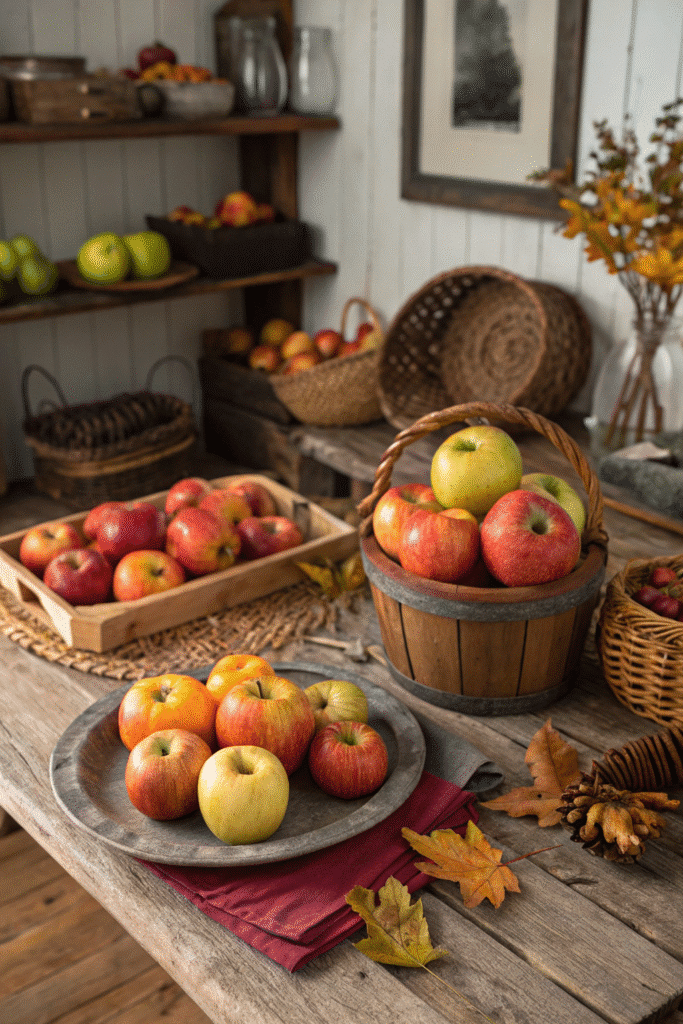
Alright, let me tell ya — not all apples are pie-worthy. I learned that the hard way when I used some random Red Delicious apples once. Big mistake. They turned into this weird mushy mess, and I swear the pies tasted more like baby food than dessert.
My Apple Experiments (a.k.a. Pie Fails)
So, over the years, I’ve become a bit of an apple snob (in the best way). I’ve tested a bunch of varieties, and here’s the truth: the best apples for salted caramel apple hand pies are ones that hold their shape while baking and bring that perfect sweet-tart kick. You want contrast — the kind that dances with the rich caramel, not fights it.
Granny Smiths? Classic. Tart, crisp, and they don’t get all soggy. But pair them with something sweeter like a Honeycrisp or even a Pink Lady, and BAM — it’s like flavor fireworks.
Apple Texture > Sweetness
It’s not just about flavor, though. Texture is king. If the apple goes mushy, your hand pies end up sad and leaky. I like slicing mine kinda thin — maybe 1/8 inch thick — so they cook fast and evenly. If you go too chunky, the crust can burn before the apples are done. Trust me, been there.
Hot Tip 🍏
Mix two kinds of apples! Like, do 50/50 Granny Smith and Honeycrisp. It gives the filling more depth, and the flavor just hits harder. It’s like layering textures and taste — fancy but still easy.
What to Avoid:
- Red Delicious – too soft, too bland
- McIntosh – breaks down too much
- Gala – too sweet and gets kinda mushy
Oh, and don’t overfill the pies just ‘cause the apples taste good raw. Once they bake, they shrink a bit, and you’ll end up with these hollow pockets that make the crust cave in. Learned that lesson after I proudly served deflated pies at Thanksgiving. 😩
So yeah, picking apples ain’t just picking apples. It’s the base of the whole dang pie. Get this part right, and you’re already halfway to pie glory.
Making Homemade Salted Caramel Sauce
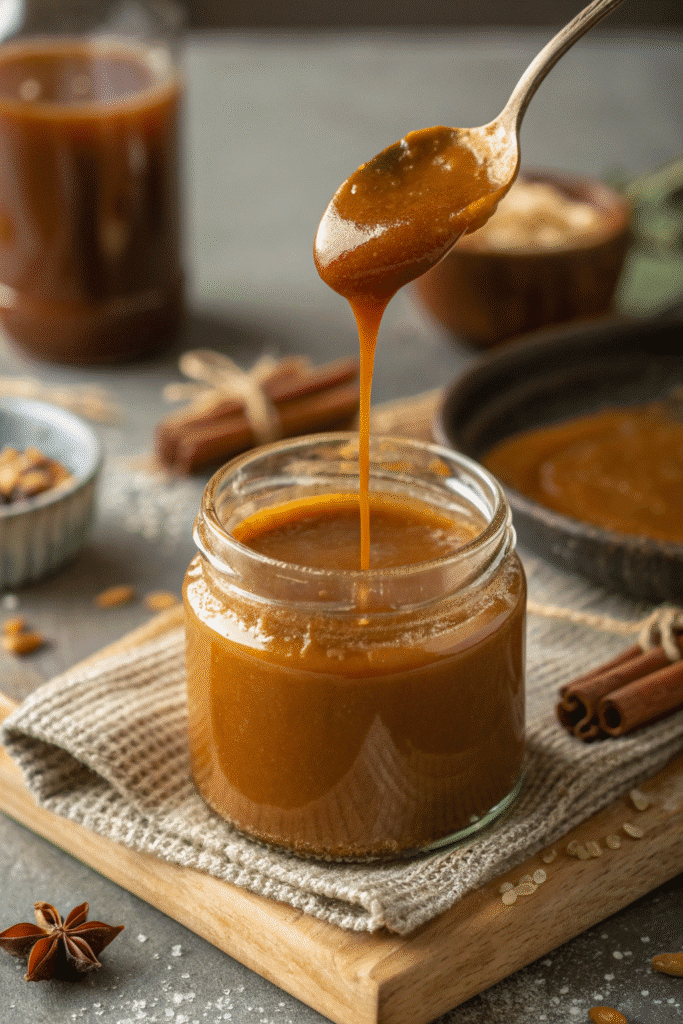
Okay, real talk: caramel used to scare the living daylights outta me. I thought it was some mystical thing only chefs with blowtorches and fancy copper pans could do. I used to buy the store-bought stuff until one day it ran out mid-pie. I panicked… then Googled a recipe and gave it a go. And holy moly, homemade caramel is easier than you think — and way better.
My First Caramel Fail (Yes, It Crystallized 😬)
The first time I made caramel, I didn’t stir. I read somewhere you’re not supposed to stir. Yeah, that was dumb. The sugar clumped, turned into rock candy, and my pan was basically ruined. So here’s what I’ve learned from trial, error, and cleaning caramel cement off my stove…
The Only Caramel Method You Need:
- Start with granulated sugar in a dry pan — low heat, patience required
- Swirl the pan (don’t stir at first) until the sugar starts melting
- Once it’s mostly liquid, now you can stir in butter — a little at a time
- Take it off the heat and slowly pour in heavy cream (stand back, it bubbles like crazy)
- Finish with a good pinch of sea salt
That’s it. No corn syrup, no thermometers. Just watch the color — you want it deep golden, not burnt brown. If it smells even slightly burnt, toss it. Burnt caramel ruins everything. Ask me how I know 😅
Salted = Game Changer
I used to skip the salt. Then I tried just a tiny sprinkle of flaky sea salt on top of the hand pies and — not exaggerating — my cousin said it was the best thing she’d ever eaten. Salt cuts the sweetness, highlights the apple, and just balances the whole vibe.
And don’t use table salt here. Use kosher or Maldon. Makes a big difference in flavor and texture.
Pro Tips from Someone Who’s Messed Up:
- Use a heavy-bottomed saucepan to avoid hot spots
- Don’t walk away — sugar goes from golden to burnt in seconds
- Let the caramel cool before adding it to the filling or it’ll melt your dough
Got Leftovers?
Stick it in a jar and drizzle it on everything. Ice cream, pancakes, your morning oatmeal if you’re feeling wild. It keeps in the fridge for 2 weeks, easy.
Making this caramel sauce was the moment I stopped being scared of “real baking.” Now I whip it up like it’s no biggie. And I promise, if I can do it without burning my kitchen down, you absolutely can too.
Crafting the Perfect Pie Crust
Let me confess something: pie crust and I weren’t always friends. For years, I bought those roll-out ones from the store thinking, “Eh, it’s good enough.” But then I tried making it from scratch — and yeah, it was a total disaster at first. Too crumbly. Too tough. One time it literally melted off the pies in the oven. Like, gone. Poof. 😂
But after enough trial and error (and yelling “WHY IS THIS SO HARD?!” more times than I care to admit), I found my groove.
Butter vs. Shortening (or Both?)
So, people get real opinionated about this. Butter gives amazing flavor and flaky layers. But shortening? It helps hold the shape and adds tenderness. I tried all-butter, all-shortening, and finally landed on this golden ratio: ¾ butter + ¼ shortening. Trust me, that combo gives you the best of both worlds — flavor and structure.
The #1 Rule: Keep It Cold ❄️
I used to mix everything with warm hands and room temp ingredients. Rookie mistake. Now I chill everything. Butter? Cold. Water? Ice cold. Even the flour, sometimes. When that fat stays cold, it creates steam pockets in the oven = flaky magic.
And here’s the trick that saved me: freeze your cubed butter for 10 minutes before mixing it in. Game. Changer.
Rolling Without Rage
Once I finally nailed the dough, I started cracking it when I rolled it out. Turns out I was pressing too hard and not using enough flour on the counter. Gentle pressure, even strokes, and rotate the dough a bit every few rolls. Also, if it starts sticking, pop it in the fridge again. Warm dough is clingy and annoying.
Don’t Skip the Resting
Chilling the dough after rolling it out sounds like a waste of time, right? But nope. That rest in the fridge (30 minutes minimum) helps the gluten relax so the crust doesn’t shrink in the oven. And for hand pies? It makes sealing the edges way easier.
My Go-To Pie Crust Ingredients:
- 2 ½ cups all-purpose flour
- 1 tsp salt
- 1 tbsp sugar
- ¾ cup unsalted butter (cold, cubed)
- ¼ cup shortening
- ~6 tbsp ice water (add slowly!)
Pulse it in a food processor if you’re feeling fancy. Or do it by hand with a pastry cutter and some elbow grease like I did in my “figure it out” phase.
I swear, once I made this crust and actually pulled out perfect, flaky pies, I felt like I could bake anything. It’s like pie crust unlocks a new level of baking confidence. And yeah, you’ll mess it up once or twice. But when you get it right? Total flex.
Assembling and Baking the Hand Pies
This is where the magic happens — and also where I’ve made the messiest mistakes. I’m talkin’ caramel bubbling out like lava, pies bursting open, and one time I straight-up forgot to crimp the edges. They looked more like weird fruit tacos than pies.
But once I figured out the right steps, making Salted Caramel Apple Hand Pies started to feel like a breeze. And honestly, there’s something super satisfying about filling, folding, and sealing those little pockets of joy.
Less Is More (When It Comes to Filling)
Look, I get it — the filling tastes amazing and you want to pack in as much as possible. I’ve been there. But overfilling is the number one reason hand pies leak. I’ve learned that about 2 tablespoons of filling is the sweet spot. Enough to get a good bite, not so much it explodes in the oven.
Also, make sure the caramel has cooled! I once poured warm caramel onto the apples… and it melted the dough before I even sealed them. Disaster. 😅
How to Seal ‘Em Like a Pro
Here’s my foolproof sealing method:
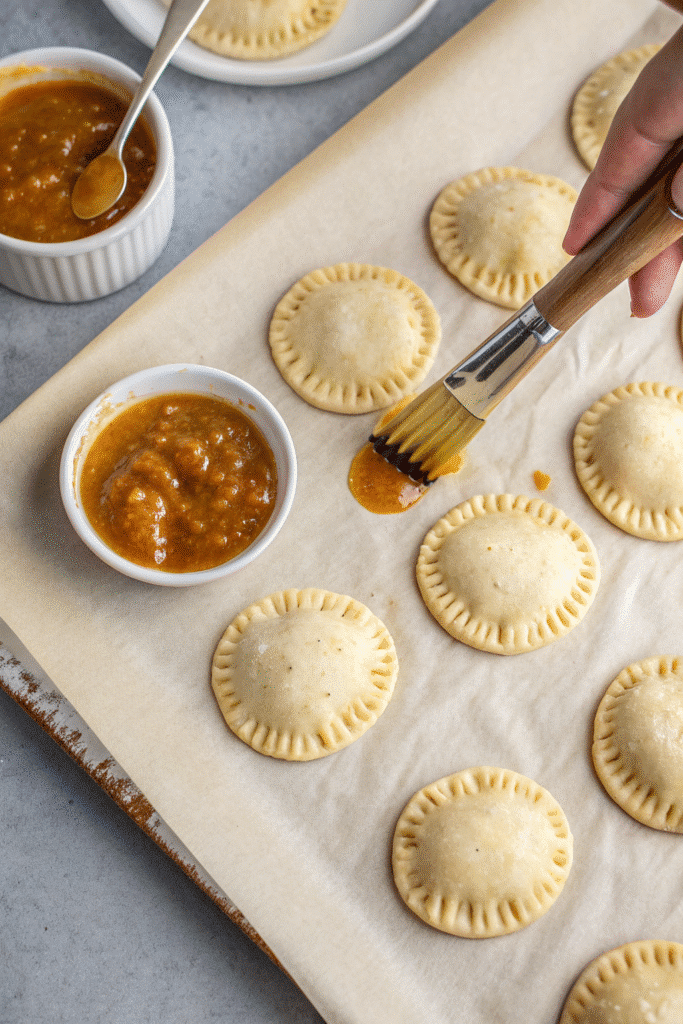
- Brush the edges with egg wash (just a beaten egg + splash of milk or water)
- Fold over and press with your fingers
- Then go over the edge again with a fork for that classic crimped look
If you skip the egg wash or don’t press firmly, they WILL pop open. And nothing hurts more than watching your gorgeous filling bubble out onto the pan.
Don’t Forget Air Vents!
This part used to freak me out. Like, “Do I really need to poke holes?” Yes. Yes, you do. I usually cut two little slits in the top with a paring knife — it helps steam escape and keeps the crust from cracking.
Golden Finish Secrets 🥚
That glossy, golden finish? Comes from egg wash. Brush it lightly over the tops before baking. If you want to get extra, sprinkle a little turbinado sugar on top for crunch.
Baking time’s usually 20–25 minutes at 375°F. But keep an eye on ’em after 18 minutes. You want golden edges and caramel just starting to bubble out.
My Favorite Baking Hack
Line your pan with parchment paper. Saves clean-up and catches any rogue caramel. Learned that one after scraping burnt sugar off a pan for what felt like an hour. Ugh.
Also, bake in batches. If you crowd the tray, the steam messes with the crust and they bake unevenly. Give ’em space to shine.
These steps may feel fussy at first, but once you get into the rhythm — fill, fold, seal, vent, brush — it becomes almost meditative. And pulling those pies out of the oven golden, puffed, and perfect? Total chef’s kiss.
Cooling, Storing, and Serving Tips
Okay, so picture this: the kitchen smells like warm apples and buttery crust, you just pulled the pies out of the oven, and you’re standing there thinking, “Surely I can eat one now.” I’ve been that person too many times — burning my mouth on molten caramel. Spoiler: it’s not worth it. 😅
Let Them Cool… Seriously
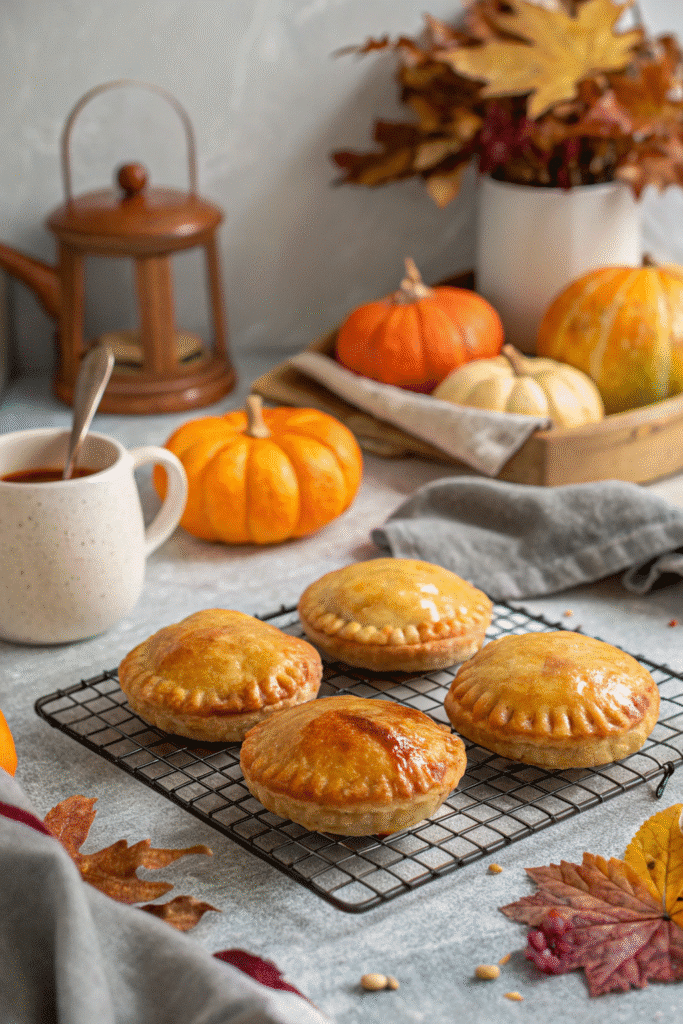
These little pies come out lookin’ like a dream, but inside? That filling is basically lava. Give them at least 15–20 minutes to cool before biting in. Not just for safety — the filling thickens as it cools, so you don’t end up with a mess all over your hands.
If you’re making a big batch for a party, I usually lay them out on a wire rack so air circulates underneath. Helps the bottoms stay crisp too.
How to Store Leftovers (If You Have Any)
Honestly, these usually vanish within a day at my house. But if you do manage to save a few:
- Let them cool completely
- Store in an airtight container at room temp for 1–2 days
- Or in the fridge for up to 5 days
Just pop some parchment paper between layers so they don’t stick together. Learned that one the sticky way.
Reheating Without Ruining
Cold hand pies are… fine. But warm ones? That’s the good stuff. To reheat:
- Oven method (best): 350°F for 5–7 minutes
- Air fryer: 3–4 minutes at 325°F — makes ’em crispy again
- Microwave: 15–20 seconds max, but the crust gets soft
Avoid microwaving too long. The crust turns gummy, and the filling heats unevenly. Trust me, not worth it.
Dress ’Em Up
You can totally serve these as-is, but if you want to get fancy:
- Sprinkle with cinnamon sugar after baking
- Serve warm with a scoop of vanilla ice cream
- Drizzle extra salted caramel sauce on top
- Add a dollop of whipped cream and call it a day
I’ve even taken a cooled pie, crumbled it over yogurt for breakfast. Zero regrets. 🤷♀️
So yeah, letting them cool and learning how to reheat without ruining the crust took me a while to figure out. But now? These pies stay good for days (if they last that long), and everyone thinks I’m some kinda baking genius. You will too.
Whew — we made it! From picking the perfect apples to mastering that buttery, flaky crust and not burning the caramel (again), making Salted Caramel Apple Hand Pies has become one of my favorite fall traditions. Yeah, it took a few crust fails and caramel explosions to get here, but dang, it was worth it.
These little pies are sweet, salty, cozy, and straight-up irresistible. Whether you’re baking for a holiday gathering, a cozy Sunday, or just because apples were on sale, they never disappoint. Plus, they’re easy to share — if you’re not too tempted to keep them all to yourself.
If you give this recipe a try, let me know how it goes! Share your hand pie pics, tag your baking buddies, or save this to your Pinterest board for the next chilly weekend. There’s nothing better than warm pie and cold weather — except maybe two pies.
Print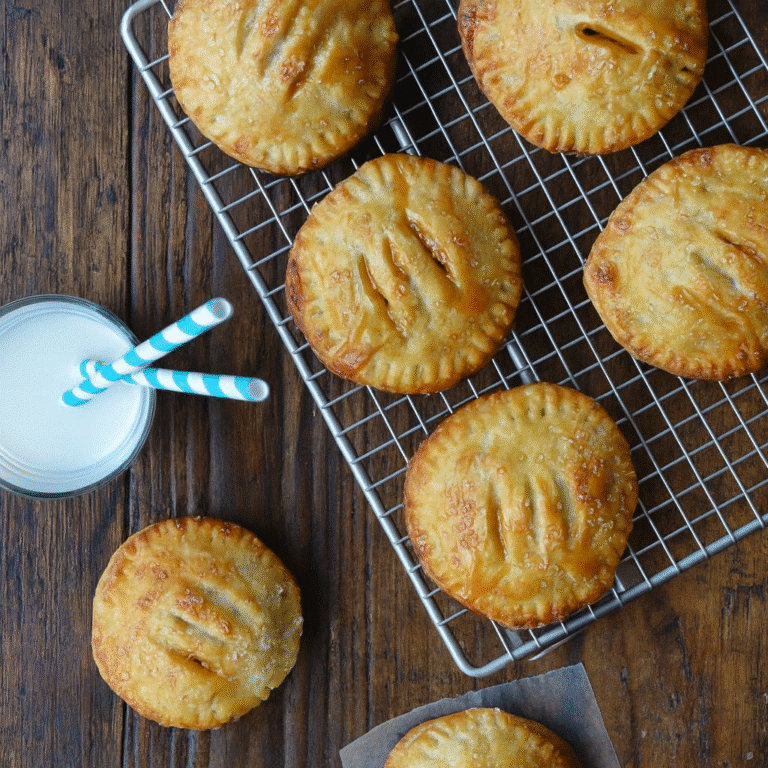
Salted Caramel Apple Hand Pies
These Salted Caramel Apple Hand Pies are your new fall obsession — buttery crust, gooey caramel, tart-sweet apple filling, and just a kiss of sea salt. Think cozy, portable pie heaven.
- Total Time: 1 hour 10 minutes
- Yield: 12 hand pies 1x
Ingredients
- 2 ½ cups all-purpose flour
- 1 tbsp sugar
- 1 tsp salt
- ¾ cup unsalted butter (cold, cubed)
- ¼ cup shortening
- 6 tbsp ice water (more as needed)
- 2 large Granny Smith apples (peeled, cored, thinly sliced)
- 2 large Honeycrisp apples (peeled, cored, thinly sliced)
- 1 tbsp lemon juice
- 2 tbsp sugar (for apple filling)
- 1 tsp cinnamon
- ¼ tsp nutmeg
- 1 egg + 1 tbsp milk (for egg wash)
- Turbinado sugar (optional, for topping)
- Sea salt flakes (for garnish)
- For caramel sauce:
- 1 cup granulated sugar
- 6 tbsp unsalted butter
- ½ cup heavy cream
- ½ tsp flaky sea salt
Instructions
- In a large bowl or food processor, combine flour, sugar, and salt. Add cold butter and shortening. Pulse or cut in until mixture resembles coarse crumbs.
- Gradually add ice water until dough just comes together. Divide into two discs, wrap, and chill for 1 hour.
- Meanwhile, make caramel: In a dry pan over low heat, melt the sugar until golden, swirling the pan (not stirring). Add butter slowly, then remove from heat and pour in cream. Stir in salt and let cool.
- In a bowl, toss apples with lemon juice, sugar, cinnamon, and nutmeg. Add cooled caramel (reserve a bit for drizzling later).
- Preheat oven to 375°F (190°C). Roll dough to ⅛” thick and cut into rounds (about 4-5 inches wide).
- Place 1–2 tbsp filling on one half of each round. Brush edges with egg wash, fold over, and crimp with a fork.
- Cut 2 slits in each pie top for steam. Brush with egg wash and sprinkle with turbinado sugar.
- Bake on parchment-lined sheet for 20–25 minutes, until golden and bubbly.
- Cool at least 15 minutes. Drizzle with reserved caramel and flaky sea salt before serving.
Notes
Mixing apple varieties (like Granny Smith and Honeycrisp) gives the best flavor and texture. Always cool the caramel before mixing with apples to avoid melting the dough.
- Prep Time: 45 minutes
- Cook Time: 25 minutes
- Category: Dessert
- Method: Baking
- Cuisine: American
Nutrition
- Serving Size: 1 hand pie
- Calories: 320
- Sugar: 18g
- Sodium: 210mg
- Fat: 17g
- Saturated Fat: 10g
- Unsaturated Fat: 6g
- Trans Fat: 0g
- Carbohydrates: 39g
- Fiber: 2g
- Protein: 3g
- Cholesterol: 45mg


