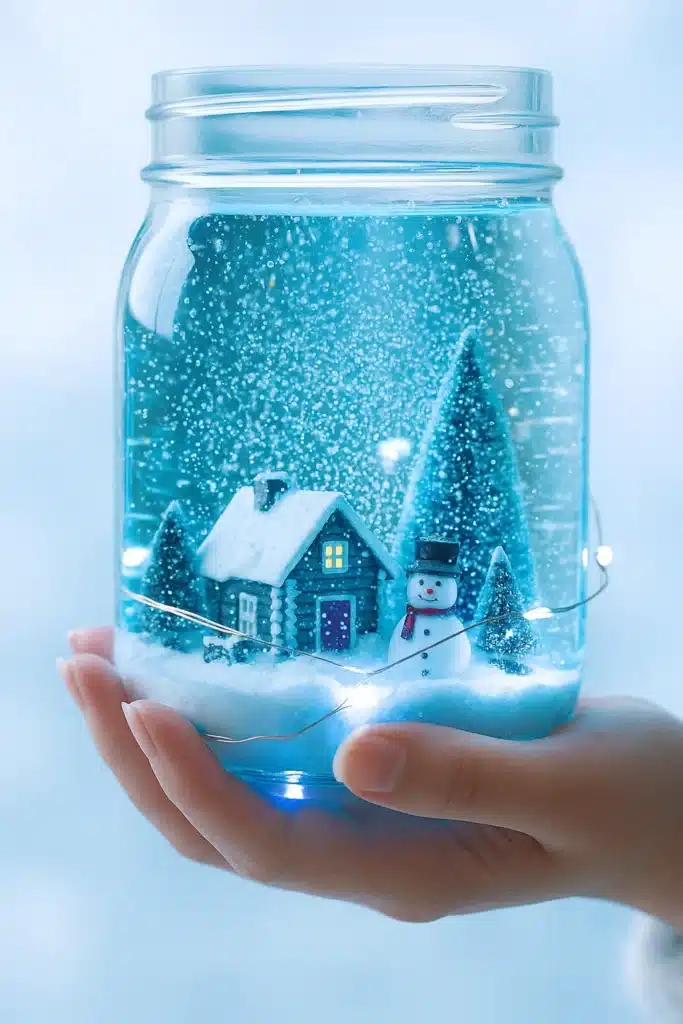
Did you know that baking soda isn’t just for cleaning and cookies? With a sprinkle of creativity, it becomes the base for your own miniature snow globe wonderland — no mess, no water, just snowy magic! As a mom of three, I’m always on the lookout for crafts that keep the kids entertained and teach a bit of science too. This DIY Baking Soda Snow Globe checks all the boxes — it’s easy, affordable, and full of wintry charm. Whether you’re making it as a gift or just want to bring some snow indoors, this project is a cozy favorite in our household!

Supplies You’ll Need for Your Snow Globe
Alright, so let’s talk supplies — because if you’re anything like me, you’ve probably started a DIY winter craft and then realized halfway through that you’re missing hot glue or glitter. Been there. More than once.
I’ve learned (the messy way) that it pays to lay everything out before the kids dive in. Especially when glue guns and sparkles are involved.
Your Go-To Snow Globe Essentials:
- Clear glass jar – Mason jars work great, but honestly, we’ve used everything from salsa jars to old pickle containers. Upcycling? Yes, please! Talk about a win for eco-friendly crafts.
- Mini figurines or decorations – I keep a little stash of mini snowmen, reindeer, and tiny bottlebrush trees. Tip: Dollar stores usually have a killer seasonal section!
- Baking soda – This is the real star. It makes the snow soft and super powdery. We usually use about half a cup per globe.
- White or iridescent glitter – Optional, but let’s be real — glitter makes everything better. Unless it ends up in the carpet… but that’s a future-you problem.
- Hot glue gun & glue sticks – Definitely let an adult handle this part. Trust me, I’ve glued my fingers more times than I care to admit.
Extra Touches for Holiday Flair
If you’re turning these into homemade holiday gifts (which I totally recommend), add a cute little name tag or tie a ribbon around the lid. I’ve even tucked a tiny note inside the jar before screwing it shut — instant keepsake.
One year, we did a “Winter Animals” theme and used tiny foxes and owls. Another time we did “Santa’s Village” with mini houses and fake lamp posts. The kids went nuts. Mixing and matching themes makes it feel like a new project every time.
Lesson Learned: Don’t Skip the Prep
The biggest mistake I made the first time? I didn’t let the glue dry all the way before flipping the jar. Yeah, my tiny snowman faceplanted into the snow like he was on a ski slope. Not ideal.
Now we use that dry time to mix up our “snow” — baking soda plus glitter, sometimes a pinch of cornstarch if we want it fluffier. The texture is oddly satisfying to touch. Kind of like kinetic sand, but sparklier.
Honestly, gathering the materials has become part of the fun. We do a “craft scavenger hunt” around the house first to see what we can reuse. It’s one of those easy kids activities that somehow turns into a whole afternoon of bonding.
Anyway, don’t stress if you’re not the crafty type — this isn’t about perfection. It’s about that little burst of joy when your kid flips the jar and watches the snow swirl like a snowstorm in a bottle.
Step-by-Step Instructions to Build Your Globe
Okay, deep breath — we’ve got our supplies, now let’s put this snowy magic together. I promise, even if you’re not super “crafty,” this is one of those easy mason jar crafts that just works. And if you mess it up a little? That’s part of the charm. Your snowman leaning slightly? Totally just braving a blizzard.
Step 1: Flip That Lid
Start by turning the jar lid upside down. That’s gonna be your snowy display base. Make sure it’s clean — I once had a faint pickle smell in one, and well… peppermint-scented snow isn’t as cute as it sounds.
Step 2: Glue Down the Scene
Use your hot glue gun to stick your mini figurines in place. We’ve done snowmen, little trees, even a moose one year. (Yes, a moose. It was majestic.)
Make sure everything’s centered and balanced — the first time I let my son glue, he stuck the tree right at the edge and it looked like it was running off the lid. Pro tip: Let the glue cool completely before moving on. You don’t want things sliding when you flip it.
Step 3: Mix the Snow
While the glue sets, we whip up our “snow.” Just mix baking soda with a little glitter in a bowl. My daughter calls it “glitter fluff.” Sometimes we add cornstarch or a pinch of salt — depends on the vibe we want. This part feels like a winter STEM activity, too, which I love sneaking in without them realizing.
Step 4: Pour in the Snow
Once your scene is solid and dry, pour that sparkly snow mixture into the jar — just enough to cover the base, usually ½ to 1 inch. Don’t overfill. Too much and it looks like an avalanche hit.
Step 5: Screw on the Lid
Carefully screw the lid (with your glued scene) onto the jar. Now comes the magic moment… Flip it.
Boom. Instant snow globe.
Step 6: Shake Gently and Enjoy
Give it a soft shake — watch the baking soda swirl and settle. I swear, it never gets old. There’s something cozy about seeing that little world inside a jar. Plus, it makes the perfect DIY Christmas craft gift for grandparents, teachers, or anyone who needs a little cheer.
And here’s a tip I wish I’d known sooner: If you plan to gift it, seal the lid with a dab of hot glue so it stays snug. Nobody wants surprise glitter snow in their purse.
Fun Variations & Creative Twists
This is where things get fun. The basic snow globe is adorable on its own, but once you’ve made a few? You’ll start thinking… “What else can I stick in this jar?” That’s how we ended up with a Star Wars snow globe last December. Darth Vader in a blizzard? Absolutely epic.
If you’re doing this as a Christmas craft for kids, giving them options is the secret sauce. Let them personalize. One of my favorite things is how different each globe turns out — no two are ever the same.
Change Up the Snow Mix
You’d be amazed how different the “snow” looks just by tweaking a few things:
- Add a pinch of cornstarch for fluff. It makes the snow feel light, almost floaty.
- A little fine salt gives it that sparkle like real snowflakes. Just don’t let them taste it — learned that the hard way.
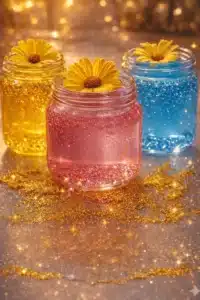
- Colored glitter? Heck yes. We’ve done red and green for Christmas, icy blue for Frozen vibes, and gold for New Year’s.
Theme It Up!
If your kids are like mine, they’ll want to turn these into custom snow globes. Here are a few we’ve tried:
- Winter Forest: Mini deer, pine trees, and a dusting of green glitter.
- Santa’s Workshop: Tiny presents, elves, and candy canes.
- Frozen World: Elsa and Olaf figurines with blue and silver sparkles.
- Woodland Animals: Owls, foxes, and a birch tree vibe — looked way fancier than I expected.
Themed globes also make the perfect holiday gift ideas. One year we made a “teacher globe” with a mini apple and chalkboard. They were a hit — and didn’t cost more than a few bucks to make.
Dress It Up
Don’t forget the outside of the jar! A few of our favorite finishing touches:
- Tie a ribbon or twine around the lid for extra flair.
- Hot glue a mini pinecone or jingle bell to the top.
- Add a name tag — boom, personalized and ready to gift.
I’ve even let the kids paint the outside with puffy snow paint. It looked like snow drifted onto the glass. Honestly, it was adorable and surprisingly easy.
Final Tip: Let the Kids Take Over
The more control I give them, the more they love it. Sure, sometimes we end up with a crooked snowman or way too much glitter (RIP kitchen table), but the joy on their faces? Worth every mess.
So go ahead — mix it up. These little jars of joy are the ultimate creative winter activity. And once you start, you won’t stop at just one.
Science Behind the Snow: A Bonus Learning Opportunity
Now, I’m not a science teacher or anything, but I love sneaking a little learning into our crafts. (Mom win, right?) That’s the beauty of these DIY snow globes — they’re more than just cute decorations. They double as an educational craft for kids, and my little ones don’t even realize they’re doing a STEM winter project.
How Snow Works Without Water
Here’s where the science-y part comes in. Baking soda creates that soft, fluffy texture that mimics real snow — but without melting or making a mess. When we shake the jar, we’re actually observing how “precipitation” can move and settle. Kinda cool, right?
We talk about how real snowflakes fall through the air, and how they can swirl in different directions depending on wind and movement. Same idea in the jar — just on a tiny, glittery scale.
Texture Talk: Solids Acting Like Liquids
This part fascinates the kids every time. The baking soda looks like a solid, but the way it flows and swirls in the globe? Totally liquid-like. That’s a great intro to something called non-Newtonian substances (don’t worry, I had to Google it too the first time).
I usually explain it like this: “It’s solid when you touch it, but soft like snow when it moves.” Then I let them test it with their fingers before it goes in the jar. Cue the giggles.
Observation and Prediction (Mini Science Skills)
We’ve made it a little experiment at home. Each kid guesses:
- Will the snow stick to the figurines?
- Will glitter float or sink?
- How long does it take to settle?
Sometimes I jot their guesses down and we do a mini observation session after they shake the globe. One time, my youngest discovered that chunky glitter moves slower than fine glitter — her little face lit up like she’d cracked a code. That’s hands-on learning at its best.
Let Curiosity Take Over
That’s the thing about crafts like this. Yeah, they’re fun and festive, but they also open the door to big questions. Like, why doesn’t the snow melt? Can we make different kinds of snow with other powders? (Spoiler: We tried powdered sugar once — not recommended.)
By the end of it, you’ve created something magical and helped your kid build observation skills, test theories, and think critically. Not bad for a five-dollar jar project.
Every time we flip one of these little jars and watch the snow swirl around a tiny pine tree or snowman, it brings that cozy, wintery magic right into our home. And honestly? That’s what makes this one of my all-time favorite holiday crafts to make at home.
There’s something so sweet about making a project from start to finish with your own two hands — especially when the kids are leading the charge. It’s more than just DIY winter decorations. It’s memories. Laughter. Sticky fingers. A little chaos and a lot of glitter.
I’ve given these snow globes as homemade Christmas gifts to grandparents, neighbors, even my kid’s bus driver. Every time, they light up like it’s the most thoughtful thing in the world. And you know what? It kind of is. Because they’re not just looking at a cute jar — they’re looking at something we made together.
If you haven’t tried it yet, go for it. Grab a jar, dig through that old box of holiday knickknacks, and just start. Don’t worry if it’s perfect. Perfection’s overrated anyway.
And hey — if you make one, share it on Pinterest! I’d love to see your spin on it. Whether it’s glitter-heavy, animal-themed, or pure snowstorm madness, your version could inspire someone else to bring the magic indoors, too.


